

Perhaps, you are going to call me “so Italian,” but I would always prefer homemade pasta over everything. Because ordering food, sitting at home is too overrated! Making your own stuff evokes the pleasure of cooking, and you can also shape your pasta precisely the way you want!
Now, you might wonder how the pasta you bought from supermarkets are beyond perfect, whereas when you try to make it with your conventional pasta maker, it either sticks when feeding or comes out all grainy and hardened.
Well, these scenarios are pretty common in every household, and to get past this problem today, I have compiled a guide on how to make pasta with a pasta maker.
Check it out!
Pasta Makers And Its Types
Well, you might have the typical pasta maker in a fine corner of your cupboard or an electric pasta maker that we have got from the contribution of technology.
However, both of them are competent and prioritized according to someone’s personal preferences.
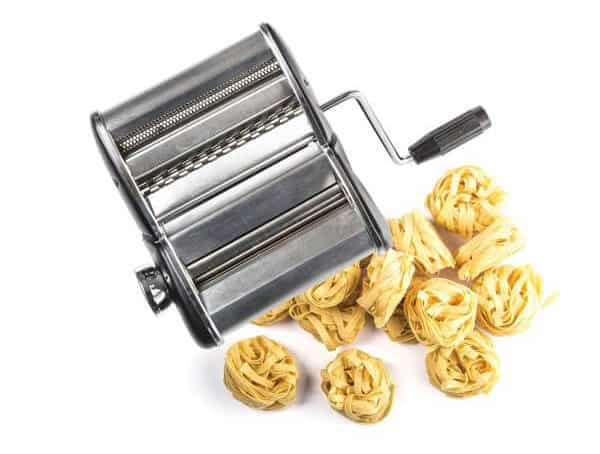
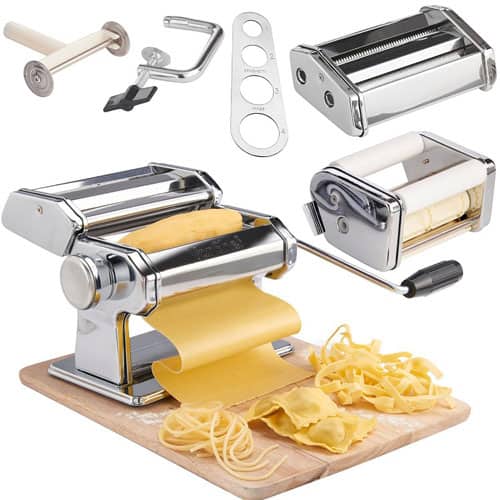
Manual Pasta Maker
You make the dough, insert it into the feeding, windup the roller, and it flattens the dough into large and thin sheets, then you again embed them into the cutter where you finally get the thinner and shaped strands of pasta or noodles.
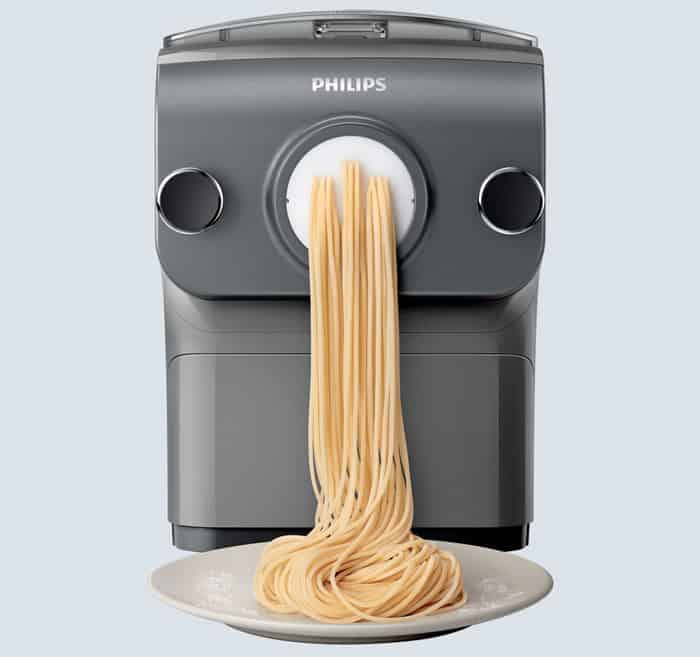
Electric Pasta Maker
Here, when you have the dough in hand, you set the programmed dial into the utmost setting to get wide and consistent pasta sheets. Then you “turn on” to your electric pasta maker and feed the dough into the roller 2-3 times and finally cut them in your desired noodle or pasta length.
The Difference Between Manual And Electric Pasta Maker
Where a manual pasta maker requires constant feeding and rolling, an electric pasta maker, on the contrary, doesn’t need the perpetual “rolling” labor.
And to be frank, that’s the only significant difference you’ll stumble upon.
Still, having a conventional pasta maker is more like possessing your own instrument that you can play with the way you want. Meaning, when you have the control over your manual pasta maker and its roller, you can deterimine the shape, the texture, predict the exertion, etc; more like customizing the pasta sheets.
As opposed to that, electric pasta makers either distributes the pasta sheets in a specific length which you cut later with the chopper, or it comes with numerous attachments featuring different shapes to provide you the desired shape.
Now if you ask which one to choose then I will suggest you to reconsider your preferences, requirements and obviously ease of maneuverability.
Making Homemade Pasta With A Pasta Maker – Everything You Need To Know
So now you are going to make some fresh Fettucine with your old-fashioned pasta maker or the electric one. Here you need only two ingredients, which are eggs and flour. To choose the ideal flour, you may ponder into confusion. No worries, though! You can take the regular all-purpose flour, and the result can be tremendous.
Let’s have a glance over the whole method step by step.
Step 1: Making the Dough
When you have the key ingredients in hand, the key ratio of tailoring consistent and tender looking pasta is one large egg for 2/3 cup flour. Now to extrapolate this into a one-pound pasta, it manifests three large eggs with two cups of all-purpose flour.
After having the accurate ration of these ingredients, it’s time to dive into the direction of making the dough.
To start off, take a food processor and pour the flour into it. Make sure you don’t sprinkle any tinge of salt at this point as you are going to boil the pasta in salted water later.
Now, cove the food processor with the lid and give it a pulse or two just to aerate the flour slightly.
Once you are done grinding the flour into the food processor, it’s time to blend the egg appropriately.
Before you break the eggs and drop them into the flour, you need to beat them well. For this, follow these easy steps,
- Take a bowl
- Break the eggs and pour it into the bowl without removing the yolk
- Take a cream whipper or an egg beater to beat the egg so that it doesn’t consist of any bubble or lumps.
Alright! Now you can go ahead and pour it into the food processor. Here bringing the lids on, you need to process the dough until it forms a rough ball, and it will take 30 seconds max.
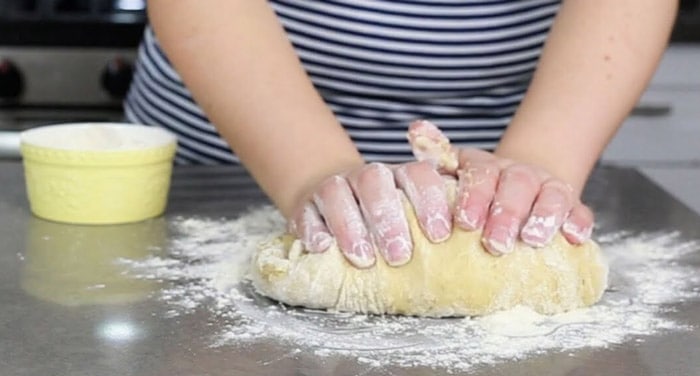
Once you’re done with the processing, open the lid, and you will see the nicely combined dough in the pot. But to make it more uniformed, you need to smear it on a clean kitchen surface and knead it well with the traces of your fingers.
Moving on to the next part, which is to allow the dough to rest for 10 minutes so that gluten strands will relax and be much easier to accommodate. Don’t forget to cover the dough with a plastic sheet or a foil paper.
Note: If your dough becomes too sticky or mushy, you can add more flour to it and give it another pulse into the food processor. Also, while kneading the dough, make sure you do some flour dusting on the surface so that the dough doesn’t stick.
Step 2: Cutting the Dough
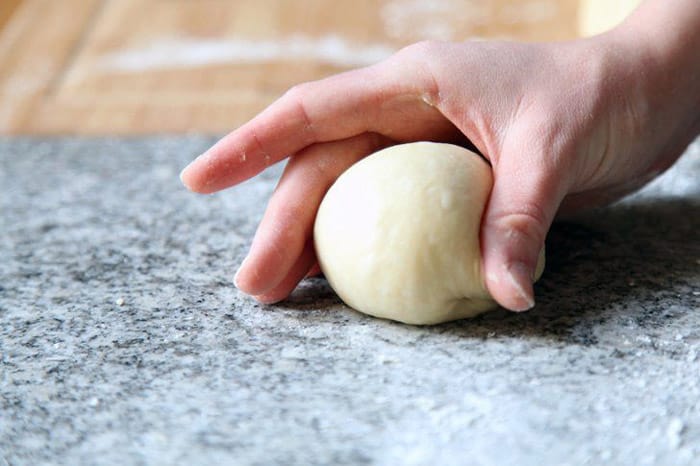
Now, its time to cut or separate the dough in smaller balls so that it will be easier to maneuver and becomes manageable as well.
With that being said, cut them into 5 or 6 smaller pieces with a large and pointy knife or chopper. After you are done, take another plastic sheet and cover the dough pieces before you start off with the pasta maker.
This hack will help you to get soft and uniformed pasta doughs because when you insert each of the dough, the rest of the pasta doesn’t get hardened.
Step 3: Feeding the Dough into the Pasta Maker
- Take a dough-cut, and with the exertion of your palms, make it as flat and thin as possible.
- Feed the dough into your pasta maker’s roller, and if you have the manual one, start winding up the handle to have thin and large sheets. Otherwise, when you have the electric pasta maker, set the program into the utmost settings and turn on the machine.
- Fold the flattened dough, press the seams together and repeat the process at the widest setting again, which is basically 0.
- Brining up the sheets into the center press it down. Now repeat feeding and run it through the roller. (Keep feeding it following the same technique until you get a thin, long and consistent pasta sheet, however, if it sticks, add some flour)
- Now keep narrowing the settings as well as feed the sheet. ( keep narrowing until you reach the last setting which can be 7 or 9)
Direction: Shaping the Sheets
Well, now you have the desired length of pasta sheets which you’re going to cut through the preferred shaped attachment. As I have mentioned making Fettucine pasta, you need to take the “Fettucine” attachment to cut them into the perfect form.
If you want them into alfredo, spaghetti, penne, or any other shape, you can run them through those attachments that are specifically crafted for each type of shape.
So! I hope you are all done with the making of pasta by a pasta maker. Now you just need to take a pasta pot, put all the seasoning or ingredients you want, cook it well, and garnish it with you go-to pasta sauce or white cream.
Bottom Line
Bewitch your stomach with a mouthful of creamy and scrumptious pasta at home.
You may end up having hard and extensively textured pasta in the beginning, but if you retain the consistency and keep trying following the exact method, you will definitely be amazed by the results.
Remember! Cooking is an art; thus, you need practice. Make sure to drop your go-to recipe or any further queries you need to know.